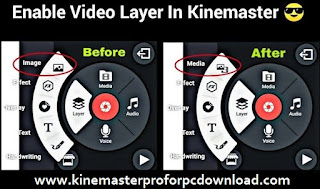
KineMaster video layer allows you to add or draw a doodle at the top of your video clips. Usually, it lets you add media, text, overlay, effects, and handwriting. The media option lets you add images or a video as a layer into the existing video clips. It means the image which you add as a layer will be inserted on the original video clip. You can use effects as a layer when you want to give a different unique look to your video. If you are a pro user of KineMaster, you can choose any effects from the asset store including mirror warp, Kaleidoscope, and more. You only get two options such as Gaussian blur and Mosaic in the free version.
 |
| Kinemaster Video Layer |
KineMaster allows you to add text as a layer. You can type the word on video clips by different types of fonts and even using your Handwriting. Let me explain how to use and add layers to a video clip on KineMaster.
Related Post: How to Make Slow Motion Video in Kinemaster?
How to add layers in a video on KineMaster:
Simply follow the below-given instructions to add layers to a video using KineMaster.
- As usual, open KineMaster and tap on the Plus icon. From the media folder, you can choose any images or video which you want to edit with KineMaster.
- Or choose a video or images from your gallery and click on the share icon and then choose KineMaster to edit it.
- After adding the video, you will see the timeline of the added video at bottom of the main interface of KineMaster.
- In order to add layers to the video, just choose the layer option from the media panel at the top right side.
- Now, you can tap on any layer which you would like to add to your video.
- Here, we will explain the procedure with the Overlay option.
- Once you select the overlay option, it will ask you to choose any of the options from Neon Lights and classic stickers at the same panel.
- You will also see Get more options right below those options. If you have purchased a premium in KineMaster, then click on the Get More option.
- Here, you can get a lot of options to download. You are allowed to install any options and use them in your video.
- If you are using the free version, just click on Neon Delights and choose any effects. Once you select it, tap on the tick mark at the top right corner to add it to the video.
- Now, you can adjust the added layer by moving it around the video.
- You can preview the video with the added layers by tapping on the play button from the media panel.
- After previewing the video, you can do some adjustments if you think it’s needed.
How to rearrange or adjust the layers after adding it:
Once you added layers into a video, if you want, you may change the order of the layers as your wish by using available tools like bring to front and send it to back. You can see these tools on the left side of the screen.
- Just touch on the layer which you want to rearrange and then click on the three dots on the top left side of the screen. Now, you will see lots of tools to choose from, which will help you to reorder the layers.
 |
| Enable Video Layer In Kinemaster |
- Some of these tools are Bring to Front, Bring Forward, Send Backward and Send to Back. Bring to the front allows you to move the layer you selected to the topmost of the timeline.
- If you want to move the layer you selected to the front of the layer you added next, then you should tap on the Bring Forward option. Send a backward tool help you to move the selected layer behind the previously added layer.
- Send to back option lets you move the selected layer to the bottom-most of the stack.
 |
| kinemaster Video Layer |
- Apart from using these tools, you are also allowed to rename the layer to easily track the layer later. To rename the layer, select the layer by tapping on it and then click on the information button at bottom of the options panel on the right side of the screen.
- Once you tap on the button, you will see a pop-up window that provides you the information about layers and also lets you rename the layer.
- If you don’t want to use the layer or you want to remove the layer, simply select the layer by tapping on it and then click on the trash can option at the left side of the screen to delete the selected layer.
End Words:
We came to the end of this article. Now, you have learned what is layer and how to add into a video and how to adjust the layers after adding. I hope the purpose for which you visited this page has been fulfilled.
Searches related to KineMaster Video Layer:
- kinemaster video layer download Tamil
- download kinemaster add video layer
- kinemaster video layer support apk
- kinemaster video layer effects download
- download kinemaster background video layer
- kinemaster video layer file download
- kinemaster layer template free download
- kinemaster layer image download